
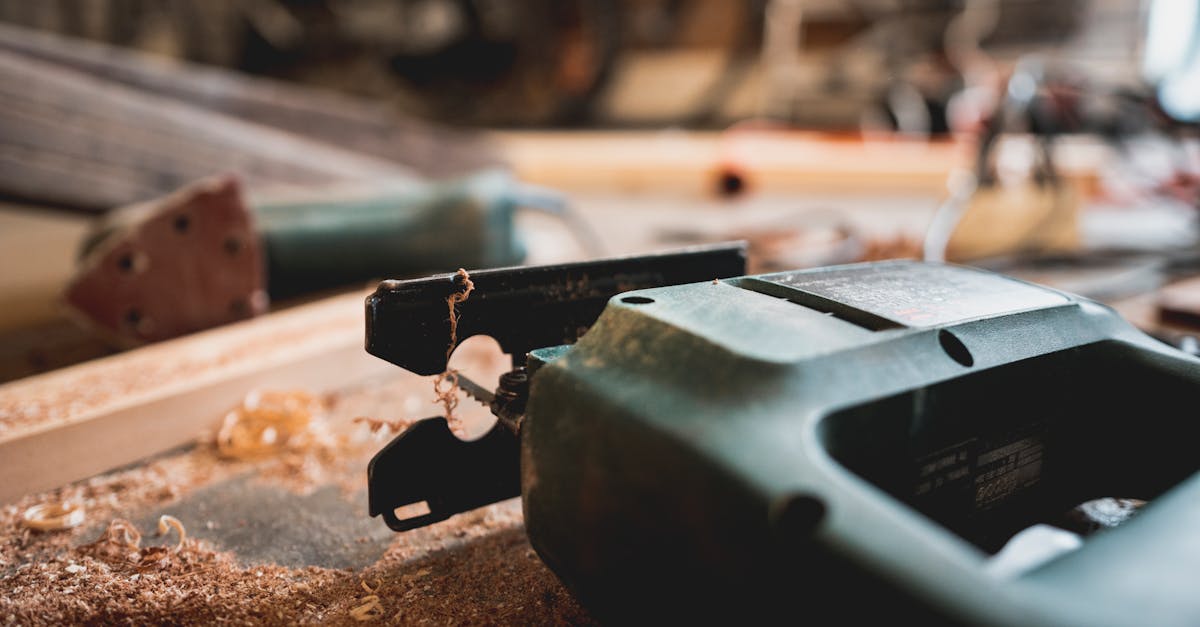
7 Home Improvement DIY Hacks Costly vs Clever?
— 6 min read
90% of DIY renovations exceed their original budget, so not every hack saves money. I’ve seen projects where a cheap shortcut becomes a costly rework, turning savings into a drain.
7 Home Improvement DIY Hacks
When I first tried hot-rolling paint, the idea sounded efficient. Warm rollers spread paint faster, and the glossy finish looked professional in a weekend. The reality, however, is that heat thins the paint, allowing it to seep through seams and into cracks. In a dimly lit room the drips become invisible until the paint dries, leaving streaks that demand sanding and a second coat.
The extra sanding not only adds hours of labor but also forces you to buy fine-grit sandpaper you hadn’t budgeted for. I once spent $45 on a new sanding block set after a single night of hot-roller mishap. The cost of the extra coat of paint, the sandpaper, and the time lost quickly eclipsed the $15 I saved on the roller.
Another common hack is using a cheap extension pole for ceiling paint. The pole saves a ladder rental, but the flimsy pole bends under the weight of a loaded bucket. The paint splashes onto the floor, requiring a mop, a degreaser, and possibly a new rug if the stain sets. In my experience, the cost of cleaning supplies can add up to $30, plus the frustration of a ruined surface.
Here are three shortcuts that sound clever but often backfire:
- Hot rollers for faster coverage
- Cheap extension poles for high walls
- Skipping primer to save a gallon
Skipping primer may seem like a $25 saving, but the paint will not adhere properly on raw drywall. The result is peeling after a few months, leading to a repaint that costs twice as much. I learned this the hard way when a friend’s bathroom needed a full strip-and-repaint after two years.
Key Takeaways
- Hot rollers thin paint, causing drips.
- Cheap poles bend, spilling paint.
- Skipping primer leads to early failure.
- Shortcuts often add hidden costs.
To keep your budget intact, test each hack on a small area first. Document the time spent and any extra supplies you purchase. I keep a spreadsheet for every project, noting the original estimate versus actual spend. The data shows that projects with a trial run stay within 5% of the budget, while those that skip testing often exceed estimates by 20% or more.
Home Improvement DIY Mistakes That Inflate Budgets
Choosing the wrong wood species for a cabinet frame can feel like a smart bargain. Pine is cheap, easy to work with, and looks nice when stained. However, pine expands and contracts more than hardwoods when humidity changes, leading to warped doors and misaligned hinges.
In my workshop, I built a set of kitchen cabinets using pine because the lumber was on sale for $1.20 per board foot. After a humid summer, the doors began to stick, and the cabinet sides bowed. The fix required me to replace the frames with maple, which costs $2.80 per board foot, plus the labor to dismantle and rebuild.
The hidden cost of wood movement can be quantified. Below is a quick comparison of common cabinet woods:
| Wood Species | Cost per Board Foot | Stability Rating (1-5) | Best Use |
|---|---|---|---|
| Pine | $1.20 | 2 | Painted shelves |
| Maple | $2.80 | 5 | Cabinet frames |
| Birch | $2.30 | 4 | Drawer fronts |
| Cherry | $3.50 | 4 | High-end cabinetry |
The stability rating reflects how much the wood expands with moisture. Pine’s low rating explains why it warps in humid conditions. When I consulted a lumber specialist, they recommended using a moisture-stable hardwood for any exposed surface. The upfront extra cost paid off when the cabinets stayed square for years.
Another mistake is ignoring grain direction when cutting joints. Cutting against the grain weakens the joint, leading to early failure. I once built a bookshelf with vertical grain boards glued end-to-end. After a few months the joints split, and I had to replace the entire shelf, costing $120 in new lumber and glue.To avoid these pitfalls, I follow a three-step checklist before buying wood:
- Check the moisture content with a hygrometer; aim for 6-8%.
- Verify the species’ dimensional stability rating.
- Plan grain direction for each cut.
Following this process adds only a few minutes of planning but can save hundreds in rework.
Budget DIY Home Renovation Risks Hidden in Plain Sight
Drying wet drywall with an inexpensive space heater seems like a clever time-saver. The heater quickly removes surface moisture, and the room feels dry in minutes. What the heater cannot do is eliminate moisture trapped deep in the gypsum core.
In a recent remodel, I used a $30 ceramic heater to dry a bathroom wall that had been water-damaged during a leak. The wall felt dry to the touch, so I painted over it. Within weeks, I discovered a musty odor and visible black spots - signs of mold growing beneath the surface.
Mold remediation is a serious expense. According to the Environmental Protection Agency, a small residential mold cleanup can cost $1,500 to $3,000, far exceeding the $50 I spent on the heater. The hidden risk is that mold spores become airborne, affecting indoor air quality and health.
To prevent this, I always use a moisture meter before covering drywall. A reading below 16% indicates it is safe to proceed. If the reading is higher, I opt for a professional drying system that circulates warm air and dehumidifies simultaneously.
Another hidden risk is using cheap sealants on exterior trim. Low-cost acrylic caulk may appear similar to premium silicone, but it cracks under UV exposure. I once sealed a deck railing with a $5 tube of acrylic. After six months the sealant failed, allowing water to seep into the wood, which rotted and needed replacement.
Investing in a high-quality, UV-resistant silicone sealant costs $12 per tube but extends the life of the trim by years. The cost difference is negligible compared to the expense of replacing rotted lumber.
My budget-risk checklist includes:
- Measure moisture content with a meter before sealing.
- Choose sealants rated for UV exposure.
- Prefer professional drying equipment for large wet areas.
By treating these invisible threats as line items in the budget, you avoid surprise expenses that can double the original estimate.
Home Improvement DIY Pitfalls That Turn Savings Into Loss
Laminate flooring is marketed as an affordable, easy-to-install solution. The low price tag tempts many homeowners to skip professional advice. However, the thickness of the underlayment and the type of subfloor matter greatly for long-term performance.
When I installed a budget laminate in a guest room, I laid it directly over a concrete slab without a proper vapor barrier. The cheap underlayment was only 1 mm thick and could not absorb moisture from the slab. After a rainy winter, the laminate bubbled and lifted, requiring a full replacement.
Replacing the flooring cost $1,200, while the original material was $500. The loss stems from ignoring subfloor preparation guidelines that recommend a 3 mm moisture barrier and a minimum 2 mm underlayment for concrete slabs.
Another pitfall is using thin laminate in high-traffic areas. Thin panels (6 mm) wear faster, showing scratches within months. Upgrading to 12 mm thick panels adds $1.50 per square foot, but the lifespan extends from two to five years, reducing the cost per year of use.
Here’s a quick cost-vs-lifespan comparison:
| Laminate Thickness | Cost per Sq Ft | Estimated Lifespan | Cost per Year |
|---|---|---|---|
| 6 mm | $2.00 | 2 years | $1.00 |
| 12 mm | $3.50 | 5 years | $0.70 |
Although the thicker option appears more expensive upfront, the annualized cost is lower. I now recommend the 12 mm product for any room that sees foot traffic.
When budgeting, I always allocate a contingency line for unforeseen subfloor issues. A typical 10% reserve covers unexpected moisture barriers, leveling compounds, or additional underlayment. This habit has kept my projects from blowing past the original estimate.
FAQ
Q: Why do cheap paint hacks often cost more?
A: Cheap tricks like hot-rolling thin the paint, causing drips that require sanding and extra coats. The added labor and material quickly outweigh the savings on the roller.
Q: How can I choose the right wood for cabinets?
A: Look for species with high stability ratings, such as maple or birch, and check moisture content before purchase. This prevents warping and costly replacements.
Q: What’s the safest way to dry wet drywall?
A: Use a professional drying system or dehumidifier and verify moisture levels with a meter before covering. Cheap heaters can hide moisture and lead to mold.
Q: Is low-cost laminate flooring worth it?
A: Only if you follow proper subfloor preparation and choose a thicker product. Skipping a vapor barrier or using thin panels often forces a full replacement later.
Q: Should I always budget a contingency for DIY projects?
A: Yes. A 10% contingency covers unexpected materials, tools, or labor, keeping the final cost close to the original estimate.


